First, the main disclaimer. This is a potentially dangerous procedure. The following guide is written for entertainment purposes only, and we at Everything N9 (and writers) are not responsible for any damage that may occur to any equipment, property, personal health, pets, or Angry Birds savegames, through the process of undertaking, or attempting to undertake, the below processes.
Now that the disclaimer is out of the way, let’s get onto the nitty gritty on how to update your Nokia N9 to the latest firmware version. This process holds true for any future firmware updates. There are 3 ways this update can be done, and they rate from easiest to hardest.Use method 1 first, then second, and only use method 3 as a last resort
First things first. Take a backup of all your data. This is done through Settings -> Sync and Backup -> Backup. Once the backup has been done, copy the files across to your computer. These will be in a .backups folder. There is the chance you will lose your data on your phone when doing a firmware update on your Nokia N9, so copy across anything else you may need. The PR 1.1 Update for the Nokia N9 will remove all your applications. These will have to be reinstalled. Ensure you unplug the phone after the backup, and before any PR 1.1 updates.

METHOD 1: OVER THE AIR (OTA) UPDATE
The easiest of the methods. Quite simple, once undertaking the backup, you may have received a software update alert on your phone. Chances are if you already have seen this alert, you are already on PR1.1, but just in case, follow this video:
METHOD 2: NOKIA SOFTWARE UPDATER
First download the Nokia Software Updater here: http://www.softpedia.com/get/Mobile-Phone-Tools/Nokia/Nokia-Software-Updater.shtml
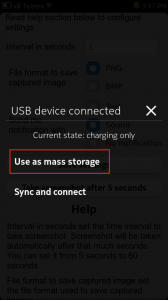
Install the Nokia Software Updater. Plug your Nokia N9 into the computer, and ensure you select “Sync and Connect”. The Nokia Software Updater should pick up your phone. If you get this screen, you can update your phone through the Nokia Software Updater. The download is 1.1GB, so ensure you have a good internet connection. Clicking “Install” will allow you to install PR 1.1 on the Nokia N9.
If however you get this screen, it means you can’t upgrade through the Nokia Software Updater. If this is the case, you have to use option 3.
OPTION 3: FIRMWARE FLASHER
This option is by far the most risky. I highly recommend you do this option only if you are competent at using the command line, and can restore a dead phone in case things go wrong. I highly recommend you wait until option 1 or 2 becomes available, and that you do not follow the below. This is very risky, and can result in a dead Nokia N9. Run this correctly, and it should work. Incorrectly, and it could be catastrophic. We bear no responsibility if this results in a dead phone. Please note too that this method is not an official update. It is a hack, and could void your warranty.
Download Navifirm: http://www.symbian-toys.com/navifirm.aspx
Download the flasher: http://tablets-dev.nokia.com/maemo-dev-env-downloads.php?f=WinFlasher_3.12.1.exe . Install the flasher.
On your Nokia N9, go to Settings -> About Product, and take note of the numbers following PR_. In the picture I have shown below, mine is PR_005. I have already updated, so ignore the 40-4 part. On your Nokia N9, it will have 34.4.
Open Navifirm, and select “Production External” from the top left drop-down box.
In “Products”, select “Nokia N9 (RM-696)”
In “Releases”, select “40-4″
In “Variants”, locate your country, phone colour, and capacity. If your country is not listed, then that is fine, select the generic firmware (the one located at the top). The country relates to region specific firmwares. More often than not there is no difference other than default language etc. *Ideally*, try and find a firmware where after PR_, it has the same numbers as you have, however this may be hard to do.
In “Files”, untick everything except the 1.1GB file. This is the firmware you will need to download.
Click “Browse” to state where to download the file to. I recommend for ease of use, download the firmware to the same location that you installed the flasher.
Click “Download” to begin to download the firmware.
Open the Flasher through Start -> All Programs -> Nokia -> Flasher. Type in the following:
flasher -F <firmware image>.bin -f -R
Replace <firmware image> with the name of the firmware file, DFL61……. Ensure that you type it with the capitals and lower cases exactly.
All going well, you should see this screen:
If you do not see the above, you have typed in something incorrectly, or the firmware file is not in the Flasher folder.
Plug in the Nokia N9, it should automatically detect the Nokia N9, and begin to update your phone.Do not use your phone whilst this process is happening, do not disconnect the phone, and definitely do not cancel the flasher.


0 comments:
Post a Comment