


This article will guide you through the process of creating a high definition backup of your Blu-ray discs using the MKV container and the x264 encoder, including 5.1 audio and subtitles. That way you can keep high quality but small size movie files in your hard drive to watch, keeping your Blu-ray discs safe at their case.
You can download Ripbot264 here. Ripbot264 1.16.4
Step 1
Before starting the encoding process with Ripbot264 you need to use an unlocking software to circumvent the Blu-ray's protection. I really suggest you let AnyDVD HD do that job. You can download it here. Ripbot264 will demux and copy the files in your hard drive, so make sure you have more than 50GB of free space.
Step 2
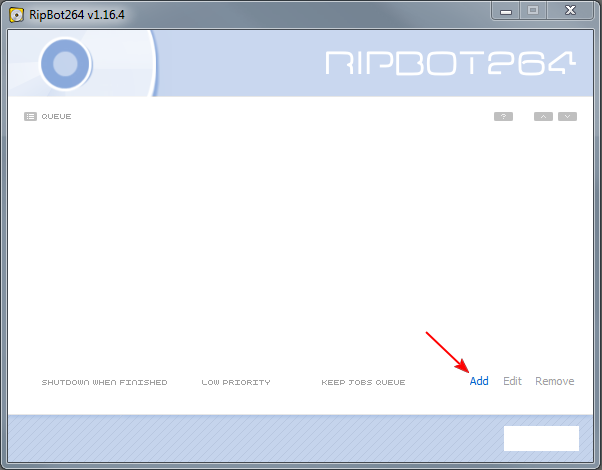
Open up Ripbot264. Ripbot itself needs a few more programs, like ffdshow and AniSynth to be installed in your computer. If they are not already installed you will see a warning screen with some links to download and install them. Do that, and reopen Ripbot to come to the window above. Click Add.
Step 3
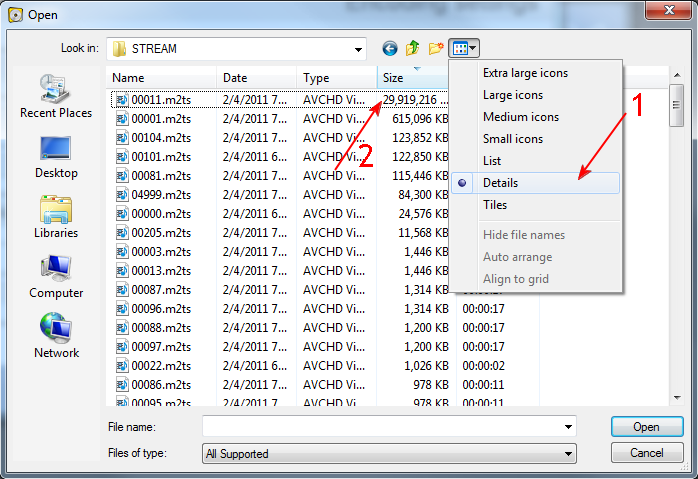
Browse to the BDMV folder of your Blu-ray (or the folder you ripped it into at step 1) and then inside the STREAM folder. Get the detailed list of the contents (1) and select the biggest file, which contains the main movie (2).
Step 4
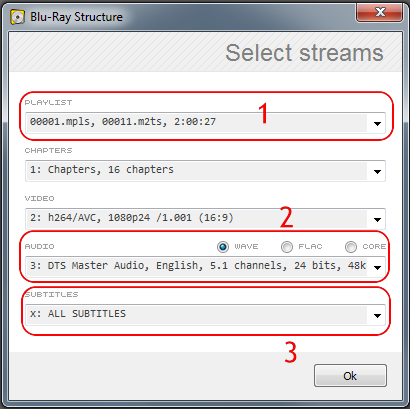
The options here are pretty straight-forward: Select the main movie (1) and the audio track that you want to use (2). If your Blu-ray has DTS audio (like this example) and you want to keep it intact select the Core option above. Otherwise, to encode to Dolby or even Stereo leave it to Wave. You should also select any subtitles you may want to add to the mkv file later (3). The chapters option lets you use the original Blu-ray chapters for the mkv file as well. Click OK to continue.
Step 5
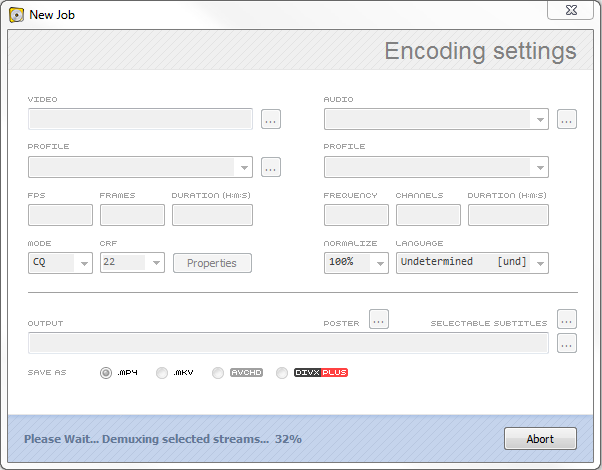
Ripbot might look like it got stuck at this point. However there is no need to worry since as you can see at the bottom of the window, it is demuxing the streams, meaning it separates the video, audio and subtitle streams into different files, a process that took about 15-20 minutes on my PC.
Step 6
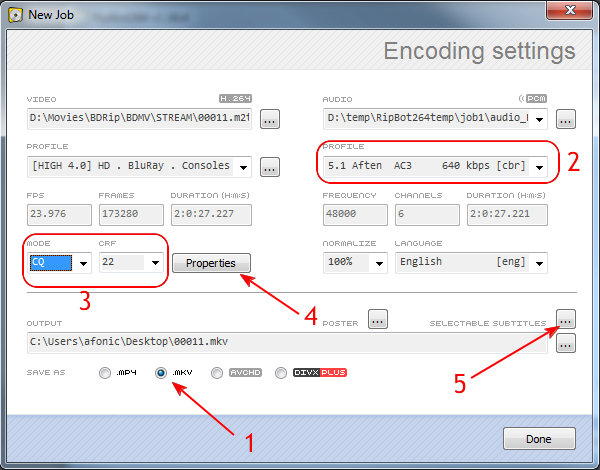
After the demuxing is done you will be presented with the Encoding settings window. We will select the .mkv (1) option to create a Matroska file. For sound select Aften AC3 (2) in order to have surround AC3 audio or if the sound was already in AC3 format the Copy stream option.
For the codec encoding mode (3), I will use the CQ (constant quality) setting of 22 value. Constant quality is a faster encoding method than the traditional 2-pass option and tries to keep a constant quality on all your files. That however means that you cannot know how big the file will be as it depends on the movie length, the CQ setting and the actual content. Usual values range from 18 to 26, with 18 being the "best" and 26 the "worse" quality. I am using this option for my mkv backups as I prefer to base my encoding on video quality and not file size. Of course, you can always select the 2-pass option and set the file size limit. Click here to see the alternative image with the settings you must have in order to use 2-pass.
Click on the properties button (4) and move to the next step.
Step 7
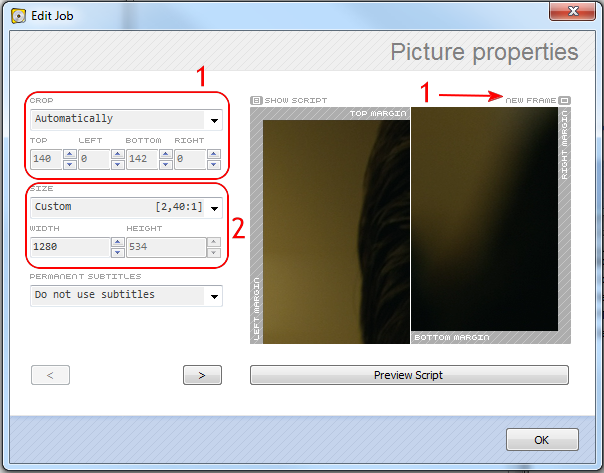
Here you can see a bit of the movie in order to set the size options. If the frame you are looking at doesn't help click New Frame (1) in order to change the picture captured by Ripbot264 to preview your settings. Set Crop (2) to automatically in order to remove the black bars. Pay extra attention in the Size (2) setting. Selecting Custom or Do not resize will apply the cropping correctly. However selecting one of the predefined resolutions (Full HD, HD Ready etc) will not remove the black bars.
What to do? If you want the original resolution, keep it at Do not resize. If you want to downscale from 1080p to 720p as I did here, select the first Custom option and lower the width to 1280 for 720p resolution. The height will be auto adjusted in order to keep the correct aspect ratio. Don't be fooled by the numbers, 1280x534 practically IS 720p (or the different value you will get for 1920 width), we are just getting rid of the unwanted black space.
Another thing that can be misleading is the subtitle option presented here. The permanent subtitles setting adds burned subtitles to the video (you cannot turn them off). Usually, since we are using an mkv file we don't want that, as we will add our subtitles at the next step in a different stream with the ability to turn them on or off. So unless you have a specific reason for why you may need hard subs (like a player that doesn't support them otherwise), just leave this option at Do not use subtitles.
The small ">" button bellow reveals more settings, like Denoise or Deinterlace that we don't need in this example. Just click OK to return to the main window and then open the subtitles options (arrow number 5 at step 6).
Step 8
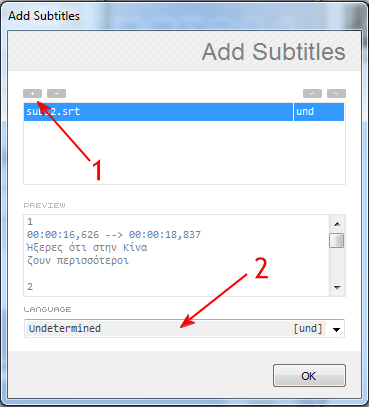
Here we can add some subtitle streams to our mkv file. Clicking the "+" button (1) will allow us to add any subtitles that we demuxed from the Blu-ray discs, you can also browse and select any other subtitles you may want to use in .srt or .ssa format. Set the correct language (2) and click OK. You will be back in the main Ripbot264 window. Click Done.
Step 9
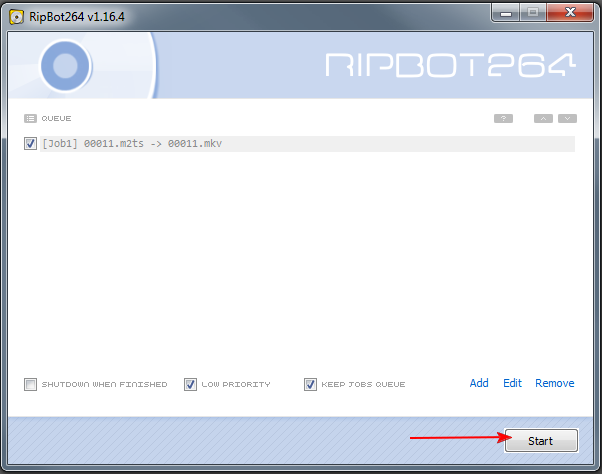
Your movie will be added in the queue as a job. If you want to add more files to convert, click add and start the guide all over again, unless of course you already got the hang of the whole process. When you are ready, click the Start button.
Step 10
That's it! If you are not using the PC, uncheck Low Priority for some extra speed. Your Blu-ray video will now be encoded and a few hours later you will have a great high definition mkv file with AC3 audio and subtitles.

Source
0 comments:
Post a Comment